Koni-Omega back repair |
|
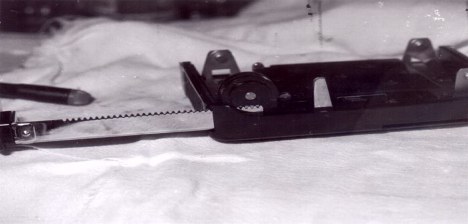
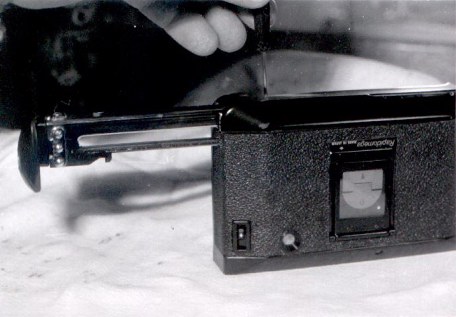
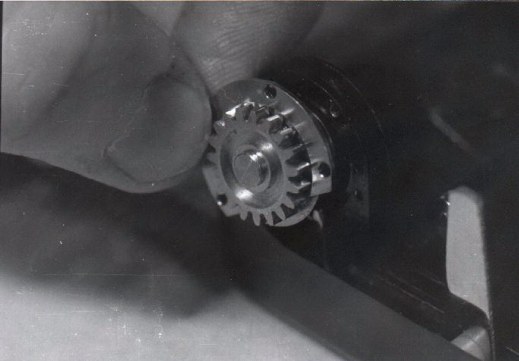
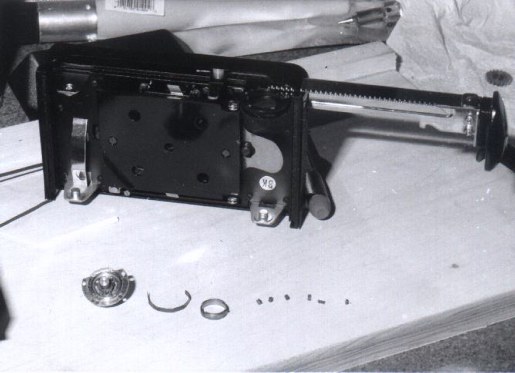
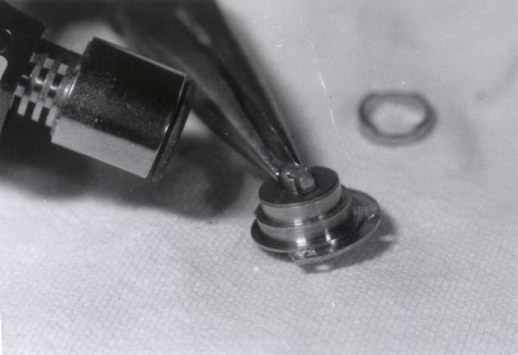
I hope you find it informative and helpful. I have recently acquired a Koni Omega M medium format camera (I explain for those unfamiliar to the camera name). I am in the process of getting it working up to snuff. One of the major problems with it when it arrived was the film advance was sticky. With the help of the Koni guru Greg Webber I have successfully cla'd (cleaned, lubed, adjusted) the film advance clutch on two film backs. I felt I might provide a service to those who are also interested and/or capable of repairing their own film backs. So, I have put together several pictures along with a written description of the steps involved. I will include sources of supply and contact info for Greg Weber (for those not mechanically inclined, wiser than myself, or just scared of doing it themselves) at the end of the tutorial. When time permits I will try to improve this page and include additional information about and photos of the Koni Omega M camera. Clutch Overhaul Tutorial Tools required: Materials required: I would imagine that this will work on most of the Koni film backs since the model M, 200, Rapid, and 100 use the same film back. Only the M and 200 models allow mid roll film changing due to the addition of a film cartridge designed on these models. Now lets begin. Remove the film back from the camera or cartridge depending on model. Operate the film advance until it reaches the last exposure number. Then push the lever lock button up and pull the film advance pinion to the extended position as shown.
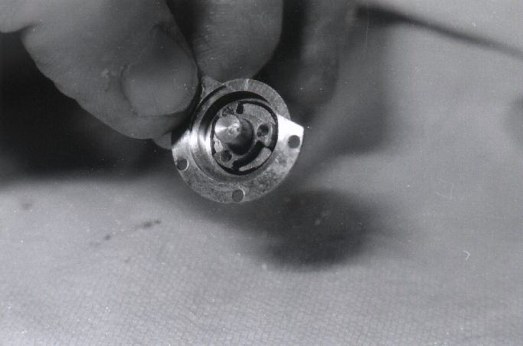
Now remove the four slotted screws holding the black cover over the gear and clutch housing.
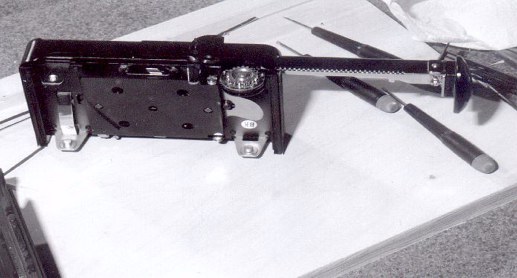
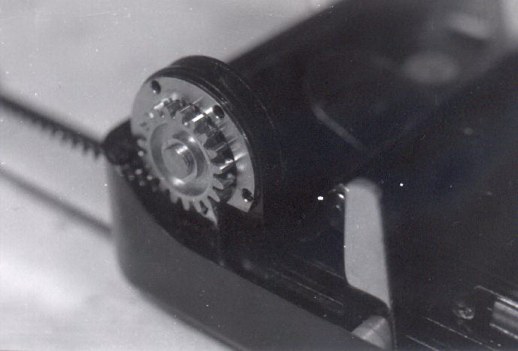
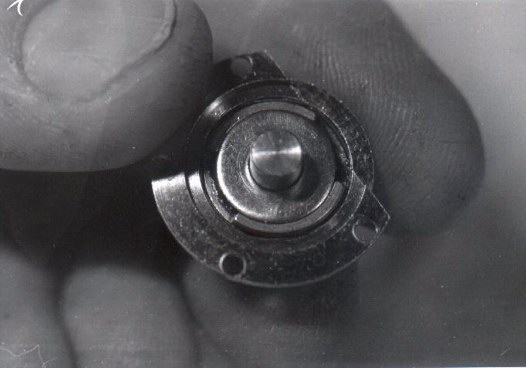
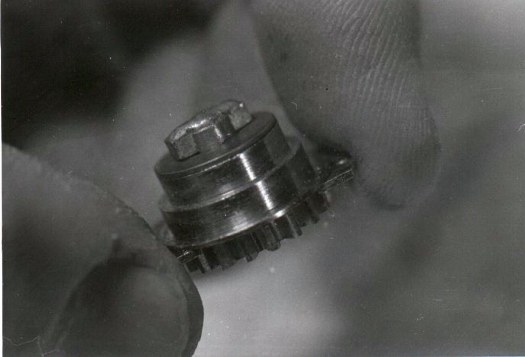
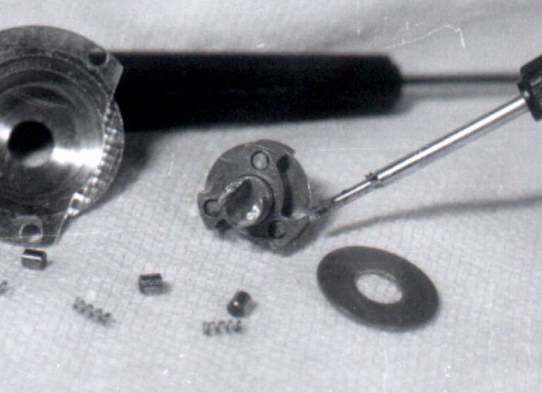
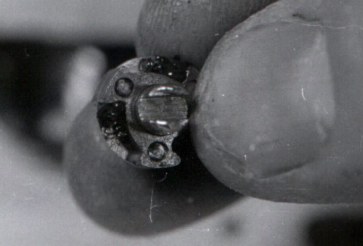
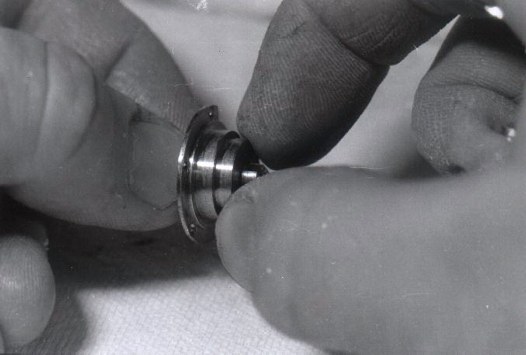
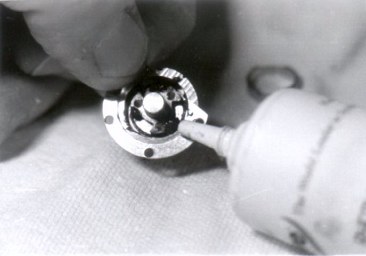
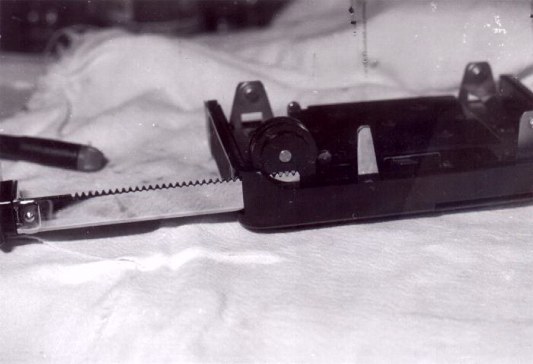
This exposes the clutch gear and a washer lies beneath it sometimes stuck to the bottom of the gear in which case they will both come out together. You should be able to pull the whole clutch assembly out the film back by gently tilting the assembly forward and grasping with thumb and fore finger as shown.
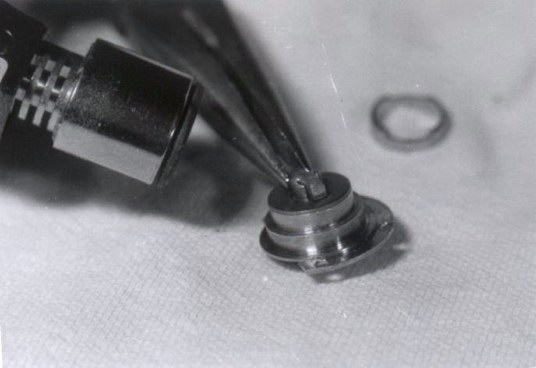
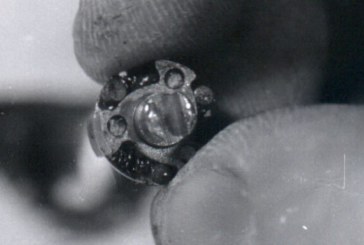
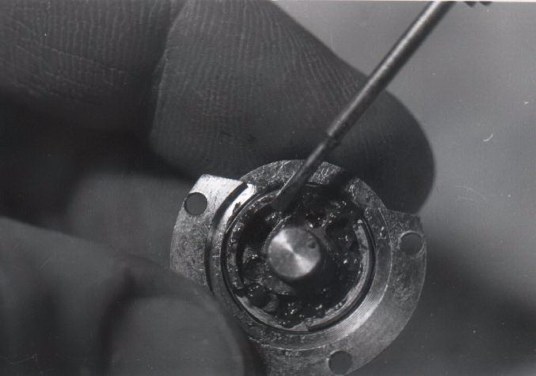
You may have to pry carefully with a small screwdriver to get it loose however mine just popped right out. Here below is a view of the clutch removed and the washer previously described in its proper location.
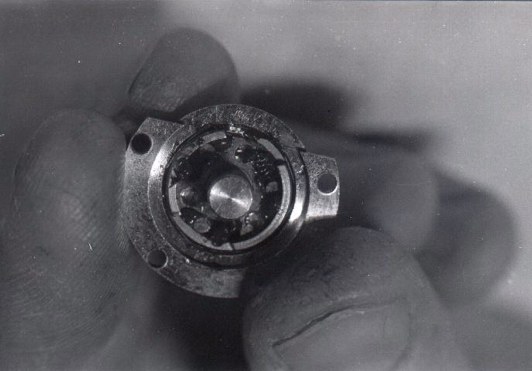
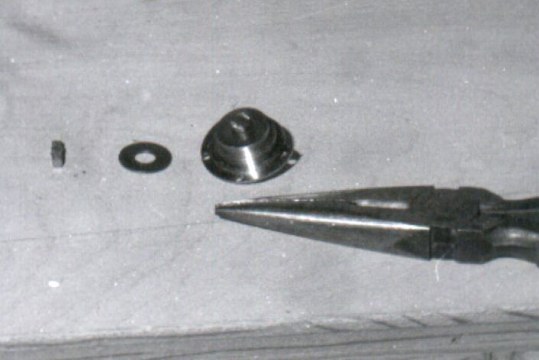
Remove the washer by just lifting it up off the shaft. This next image shows the actual clutch components. Here comes the nitty gritty.
The clutch assembly actually contains two clutches, an inner and outer. I will call the first clutch you see here the outer clutch. At this point, if you haven't already, you should be working over a table with a cloth preferably white to be able to see your parts better and to keep from losing them since they are quite small. You will also need a good light source. Using a small screw driver, pry out the three roller pins and three springs and place them in a jar of acetone or xylene to soak the old gummy grease off. Be very careful as these solvents are highly flammable. Definitely don't smoke while cleaning all Next, remove the metal ring shown below (with keyed notches which match other side of film take up spool gear). Then remove the friction spring. Place all parts in the solvent.
Shown below is the outer clutch parts removed and cleaned.
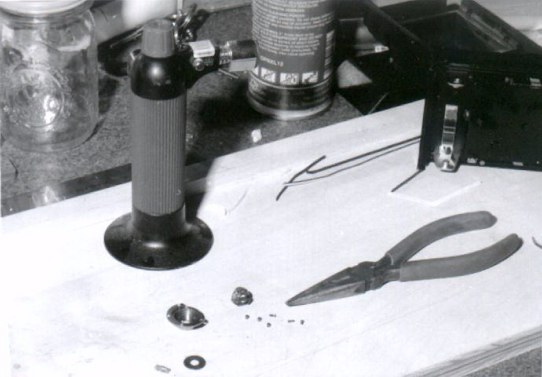
This next image shows the clutch housing at its other end. The tee at the end is what inserts in to the film spool to advance the film. You must remove this to gain access to the inner clutch. Some newer models have a screw holding it on, the older one's such as mine used solder to hold the metal piece in a slot in the end of the clutch shaft. To remove it you must grasp it with a pair of needle nose and heat the tee until it pulls apart. Make sure you do this on an inflammable surface and away from the solvents.
A mini torch which uses butane works well for this since it has a smaller flame which you can concentrate on a small area. A propane torch would blast the whole clutch assembly and take longer to heat the desired area as propane burns at a lower temperature.
Another washer is found under the metal tee. Remove it as well. Here is the result.
Turn the clutch shaft clockwise with your fingers or pliers at the same time pulling out. The shaft should come out of the chrome casing and expose three more roller pins and springs. Keep these separate from the outer clutch parts and clean them in solvent. Here is the clutch assembly completely disassembled showing the torch used to heat the tee solder.
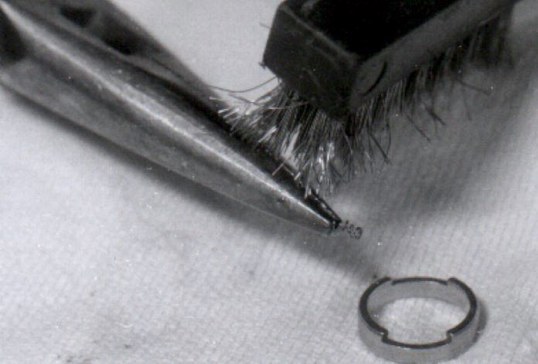
After soaking the parts, brush each part individually with a toothbrush or wire brush. Hold the springs with needle nose pliers and carefully run the brush through the springs across the coils. Hold the spring on one end, then the other to clean both ends well. I found the solvent isn't sufficient on its own to get rid of the glue like grease left behind. All parts should look clean as new when done.
It helps if you hold the spring down on a clean piece of wood and slowly stroke the brush through. Sometimes the brush will grab the spring and get caught in it. Just take your time and don't! lose the springs. Here are the parts completely clean and ready to reassemble. Note the clutch shaft and the tapered slot indicated by the screw driver. It is pointing to the wider end of the slot. Apply a small dab of synthetic grease at all three points around the shaft. You will insert the three springs in to the dab of grease at this end first.
Note the small amount of grease I have placed already on the first two locations indicated below.
Here are two of the springs inserted in their proper locations.
Now place a small dab of grease at the other end of the springs. Insert the roller pins in to this dab of grease with the flat end pointing in the same direction as the clutch shaft as shown below. The grease acts as a glue to hold the parts together to aid in reassembly. This is the trickiest part of the whole operation. You must get the inner clutch assembly back in the chrome housing without the pins and springs shifting out of place.
Grasp the chrome housing with one hand while holding the clutch shaft with the other. Slowly and gingerly rotate the shaft clockwise while inserting the shaft with the notched end first in to the housing. If all goes well it will insert all the way with the slotted shaft sticking out the other end. Make sure it turns freely in the clockwise direction. It should not be able to be turned in the counter clockwise direction if the inner clutch is working properly. Make sure none of the springs got pinched between the sides of the chrome housing.
The next image shows the shaft fully inserted in to the housing ready to have the tee resoldered in the shaft groove. Place this side down against a non flammable surface.
Install the washer over the notched end of the shaft until it bottoms out. Grasp the small piece of metal with needle nose and place it at the top of the slot. Heat the tip of the slotted shaft until the metal drops down in the slot. Center it and immediately cool the assembly with a wet rag. If it stays hot too long, the grease will all melt and run out of the inner clutch assembly. Some loss is inevitable.
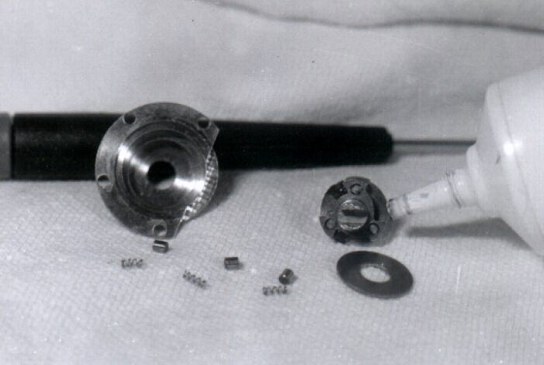
If there isn't enough existing solder to sufficiently resolder the joint apply additional as needed to get a smooth bead on top of the tee. Completely cool the assembly and retest the turning of the shaft to check for proper operation. Turn the assembly over to expose the outer clutch. Insert a small dab of grease at the narrow end of the tapered slot. Do this to all three locations. Now install the friction spring (not the tiny coil springs) and metal ring. Picture below shows grease in proper location without friction spring or metal ring for clarity.
Now, this time, install the roller pins first in to the dabs of grease. Install all three. Then fill the other end of the tapered slot with grease. Insert the springs by placing them at an angle down towards the roller pin and carefully apply pressure with one screwdriver at the free end of the spring to slightly compress it. At the same time use a second screwdriver to push the spring all the way in the grease. This may take a few tries. Here the springs are properly inserted with the clutch well greased.
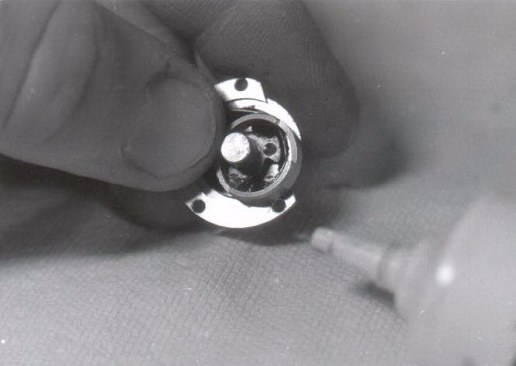
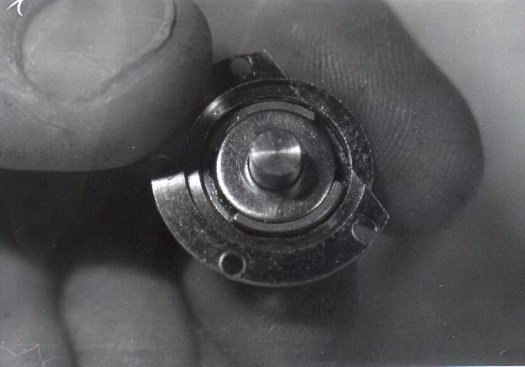
Now install the washer and wipe off any stray grease. You don't want excess grease to leak out on the film advance gear or pinion. These don't require lubrication. In fact it would be highly undesirable as you will get grease on you when you operate the film advance and possibly even on your film. It should look like this.
Now install the gear on the end of the shaft and line it up with the notches in the metal ring on the clutch. Tilt the assembly back to reassemble the clutch to the film back as you did to disassemble. Place the black metal cover back over the clutch assembly and reinstall the four screws. It should look like this again except now your film advance should work smooooth as silk.
Congratulations!, if you made it this far you're one patient S.O.B. You have now successfully cla'd your own clutch assembly and its ready to work for another 30 years. Randy's Koni Omega Page Sources of Supply I am unsure is he still on business or not (editor) Greg Weber Phone: 402-721-38732022 E. 7th St. Fax #: 402-721-3838 Greg specializes in all repairs of Koni Omega's. |